Wednesday 30 July 2014

Sandlot Reveal

sorry i'm late this month! my little boy turned 3 last weekend and my in laws were in town to celebrate! we spent the last few days together hence i didn't have an opportunity to pop in here... we had a celebrate for ethan in school on friday and a family dinner on saturday. a double celebration for our little monkey! love you lots darling and here's wishing you a very happy birthday!

so, today i finally found time to sit down and i can't wait to share with you the reveal of studio calico's sandlot kit! i've had so much fun working with sandlot scrapbook kit, the scrapbook add ons hercules, jet and smalls. they are filled to the brim with lots of pretty papers and embellishments! 

here's what i made this month...

be happy
(main kit only)


i love love love the 'be happy' stamp designed by talented ct member shanna noel so i grabbed my color theory ink pads and stamped in different colors to create a background for my black and white photo. what i love about the color theory ink pads is that it always coordinates very well with the colors of the kit! i always use the mood board for the month and pick out the matching colors from my ink pads. so for this layout, i used well red, blush crush, coral bay, orange country, sunny day, yes peas, emerald city, mint hint and clean state. then i decided the placement of my photo and layered it with the colorful dot washi tape, ribbon and vellum. to complete the title, i stamped the 'be' accent on the circle metal tag and adhere it to my photo.
and to finish off, i added my date stamp and journaling around my stamped accents. 


this month, the ct gals have a 'lift a member' challenge and I chose to lift a layout - black mountain from ashli oliver - souphousemama. i love ashli's work!!! when i first saw here gallery i am amazed! so much inspiration! i love all the love the layers and details she put every single one of her layouts! i am a new fan...

the first thing that caught my eye in ashli's layout were the 9 decorated circles. i love adding little details to my layouts and thought it would be a fun layout to put together.
and this is my version...

little treasures
(main kit, hercules, jet, smalls)


i started my layout with the grey grid patterned paper as my background. instead of circles, i decided to use the plastic doilies from hercules. the doilies reminds me of my scallop punch so i used it to punch some patterned paper which i used to make up my grid design. 

i also played around with the polka dot stencils from hercules. i am really bad with misting and the result didn't too good but thankfully it still looks alright after i used my scallop punch. i think i need to practice my misting more often :P

with all the embellishments and papers on hand, my grid design came about quickly and i really enjoyed decorating each doily/ scallop.

i decided to scrap this photo of ethan with his daddy's old toys. my mother in law kept them in good condition and ethan had lots of fun playing with them when we were back in kl. hence, i came up with my title - little treasures...

here's a close up shot


that's all i have for you for this reveal...

i did a quick check of the shop and realise that hercules is still available! i am surprised because its my favourite add on this month!


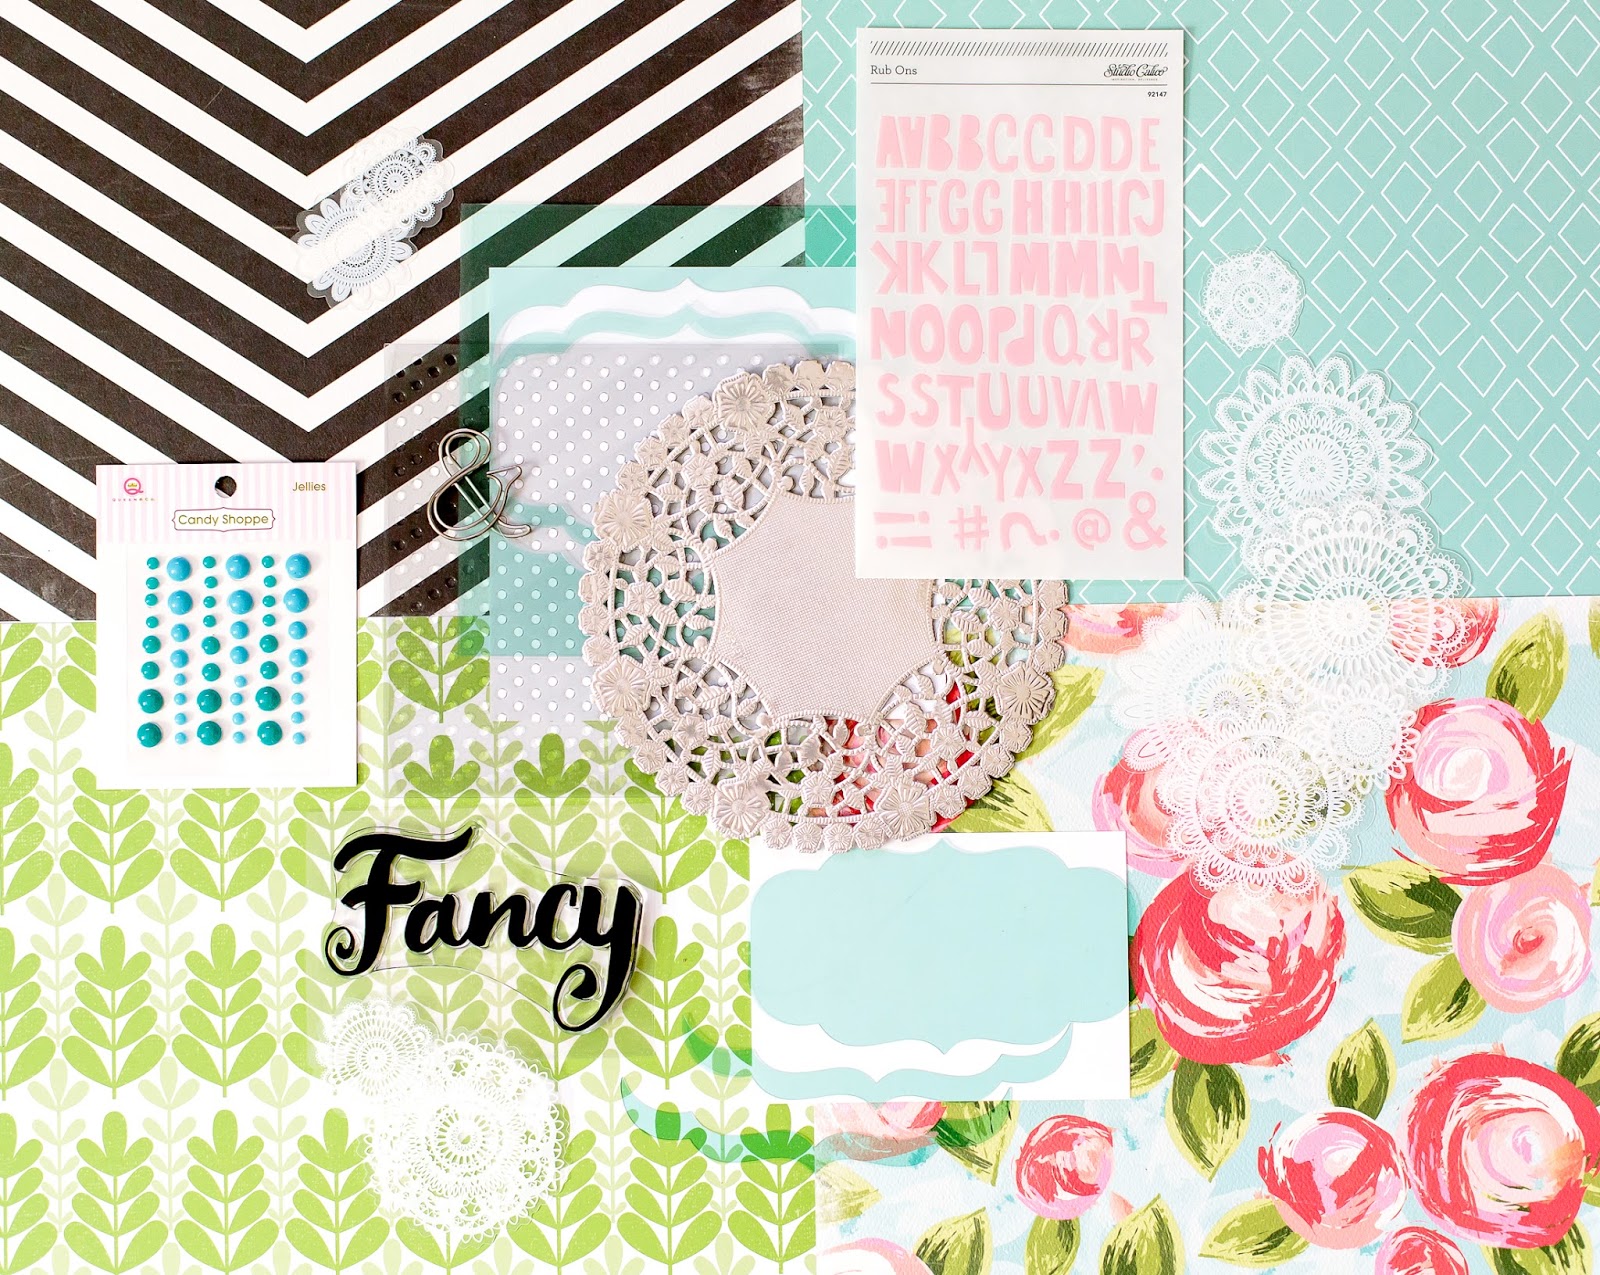
i can't tell you how much i love the papers from hercules because they can be cut and used as embellishment. i cut out the roses from summer floral paper, leaves from laguna palms paper and the cute little deer from blue ridge paper. i am also in love with the black strips paper and am still hoarding a small piece of it. 
another favourite are the plastic doilies, i love doilies and i love them when they are transparent! great for layering. other favourites also include the polka dot mask, ampersand paper clip and of course the fancy stamp! i didn't get to use the pink rub on alphas but they do look cute too!

so if you are considering getting this add on, i highly recommend it! :)

thanks for dropping by and see you soon!

xoxo
Lilin

Sunday 27 July 2014

More Bright Ideas At Studio Calico

have you had times when you have no inspiration to scrap at all? from time to time, i do have that, i will stare at my supplies for hours and have no idea what to do with them! during those times, i wish i had some ideas to help me jump start my creativity... lucky for me, more bright ideas class is coming to studio calico


if you have $5 to spare, this is the class you wouldn't want to miss!  follow Nicole as she guides you through 8 creative challenges designed to make you look at paper and glue in a whole new light...

besides the creative content you will be getting from the class, you will also have access to these beautiful cut files and digital printables...


registration for more bright ideas ends july 31 at 11:59 pm est so hurry! 

if you would like to sign up or find out more details on this class, click here!

hope to see you in class!

xoxo
lilin

Sandlot Sneaks

hello! just wanted to drop in to share some sneaks for studio calico august kit - sandlot! i received my kits 3 days ago and went straight to play and made these 2 layouts!


my first sneak is of my main kit only layout. i love love love the 'be happy' stamp designed by shanna so i got my color theory inks out and created a colorful background for my black and white photo of ethan. these ink pads come in 12 beautiful colors and are perfect to work with the kits! refills for these ink pads are also available now!


the kits are filled with lots and lots of beautiful paper and embellishments this month! i especially love this rose paper from hercules (add on 1). i'm happy i can cut many roses from that single piece of paper. in addition to hercules, i used a mix of the main scrapbook kit, jet (add on 2) and smalls (add on 3) for this layout.

remember, the reveal is on 27th at noon EST/ 11am CST for subscribers and  27th at midnight EST/ 11pm CST for non subscribers.

thanks for dropping by and see you at reveal!

xoxo
lilin 

Wednesday 16 July 2014

Workspace At Studio Calico

have you signed up for the new class at studio calico - workspace? the class will be taught by the amazing marcy penner and she will walk you through steps to take your work area from tiring to inspiring. i will be moving to my new place within the next few months and one exciting part of it is that i will get to reorganise my space! given that my new apartment is really small, i wouldn't call it a space as it will most likely be just a section of Ethan's wardrobe that i will claim to keep my scrapping stash and continue working on the floor (like i am doing now) or at the dining table. ha! nevertheless, it will be my very own and this class would be just perfect! ok, now for the details of the class...


 with two lessons a week, marcy and her team will take you step by step through the process of assessing your space & storage, your stash, and how you use it so that you can organize your workspace in a way that works for you.

you will receive these useful hello forever planners and digital files when you sign up!
  • Worksheets for each lesson, to help you work through the class
  • Printable tabs to use to label your supplies
  • Cut files for tabbed dividers for your 3x4in and 4x6in cards
  • Reveal planning checklists
  • Kit tracking sheets
while you sign up for the class, you will also be happy to know that studio calico has stock up some items that will help you with your organisation. these are some that has caught my eye...


1. handbook - i am currently using handbooks to keep my stamps. the handbook is available in other colors and you can find them here!

2. tabs stamp & die set - keep tabs of your favourite projects with these this tab stamp and die set by hello forever. for those of you who don't need the die, there is a stamp only set which you can find here.

3. lock tight containers - i need to get my hands on this! i am currently storing my sequins in small plastic storage boxes and ethan has his eyes on them! he shakes them!! ha! and now my sequins are in a mess! so these cute lock tight containers should help keep the sequins in order!

4. stamp and die storage pockets - since i am storing my stamps in handbooks, i would store my dies in this clear pockets.

5. white metal rimmed tags - currently i keep my enamel dots together with metal rings, so these tags would be perfect to label them!

for more class supplies, you can click here.

if you would like to sign up or find out more details on this class, click here!

the class starts on august 4th! hope to see you there!

xoxo
lilin

Saturday 12 July 2014

A Closer Look - Here and Now

it's the weekends! i am still waiting for my studio calico august kits to arrive so i thought i should use the spare time i have now to share a tutorial of how my layout using penny arcade came together... here's the layout i am going to share today! 


so here we go...


i selected some gelatos and colored on a piece of white cardstock. i love gelatos, they are creamy and are like a combination of crayons and watercolors. i color the gelatos the same way i would with crayons and i use a wet brush to blend the colors and the end results looks like a more vibrant version of watercolors. when i am working on studio calico kits, i usually decide on the colors to use base on the mood board. this way, i am sure that the colors would coordinate perfectly with the kit. 


i used this subjective moodboard by ania maria and decided on the different shades of yellow and pink and some mint green.


i do not have a mint green in my set of gelatos so i usually use blend green, white and a bit of blue and yellow. however, this time, it didn't turn out as well as i want! in fact, i thought it will be better without the mint green. so i decided to cover it with a piece of patterned paper. 


here's how it looked after covering the green.


next i decided on the placement for my photos and added a die cut i cut using my silhouette cameo. this floral die cut is an exclusive for studio calico july kits designed by kim steward.


i wanted to layer my photos a bit, so i added some vellum. next i added some stickers base on the background color. there are no embellishments that can match the bright pink so i cut the butterfly from one of the patterned papers - under the boardwalk. 


at this point, i thought the page doesn't look so balance with the butterfly at the top so i shift it down and felt it looked better. i also added another strip of black and white patterned paper on the left side. i used the water-colour die cuts - here and now as my title. added more stickers, some buttons and enamel dots. lastly, my journaling and stamp date and the page is complete!

all products used are from studio calico penny arcade main scrapbook kitskee ball (add on 1), fortune teller (add on 2) and spun sugar (add on 3)

thanks for dropping by and i hope you enjoyed this simple tutorial. have a great weekend!

xoxo
lilin

Thursday 10 July 2014

Celebrate

hi! it's mid week and i hope that the week has been good for you so far! today i thought i will pop in here to share a layout i made as a gift to my cousin and cousin in law for their wedding.


since its a wedding gift, i wanted to make a layout with a romantic and whimsical feel to it. so i thought of the ruffled crepe paper from dear lizzy - polka dot party collection . however, i am unable to find it in my local scrapbook store so i decided to make one myself using a piece of white card stock and sometissue paper. i first cut the tissue paper into strips then slowly adhered each piece to the card stock with my tape runner. i started from the bottom of the page and worked my way up. 


for this layout, i purchased some digital cut files from fresh cut illustrations and cut them with my silhouette cameo. these lovely die cuts are designed by amazing talented kim steward and you can purchase them from wilna's shop iheartstudio. the rest of the page came together easily as i layered some pink tulle from my studio calico camelot kit, and some die cuts and vellum shapes from maggie holmes styleboard collection and other bits and pieces from my stash. 

here are some detailed shots...


i'm glad that my cousins love this layout and here's wishing them a blissful and everlasting marriage!

thanks for dropping by!

xoxo
lilin