Tuesday, 22 April 2014

Camelot Sneaks

hi everyone! the reveal of camelot kits at studio calico is almost here! take a look at the mood board for this month! 


amazing colors isn't it? the kits are truly gorgeous and i had lots of fun playing with them! this month, look out for the excalibur add on kit! its a mini album kit that maggie will be using for her upcoming mini book class! the registration for the class will open soon, so do keep a lookout! 

ok... now for a peek into my projects! 


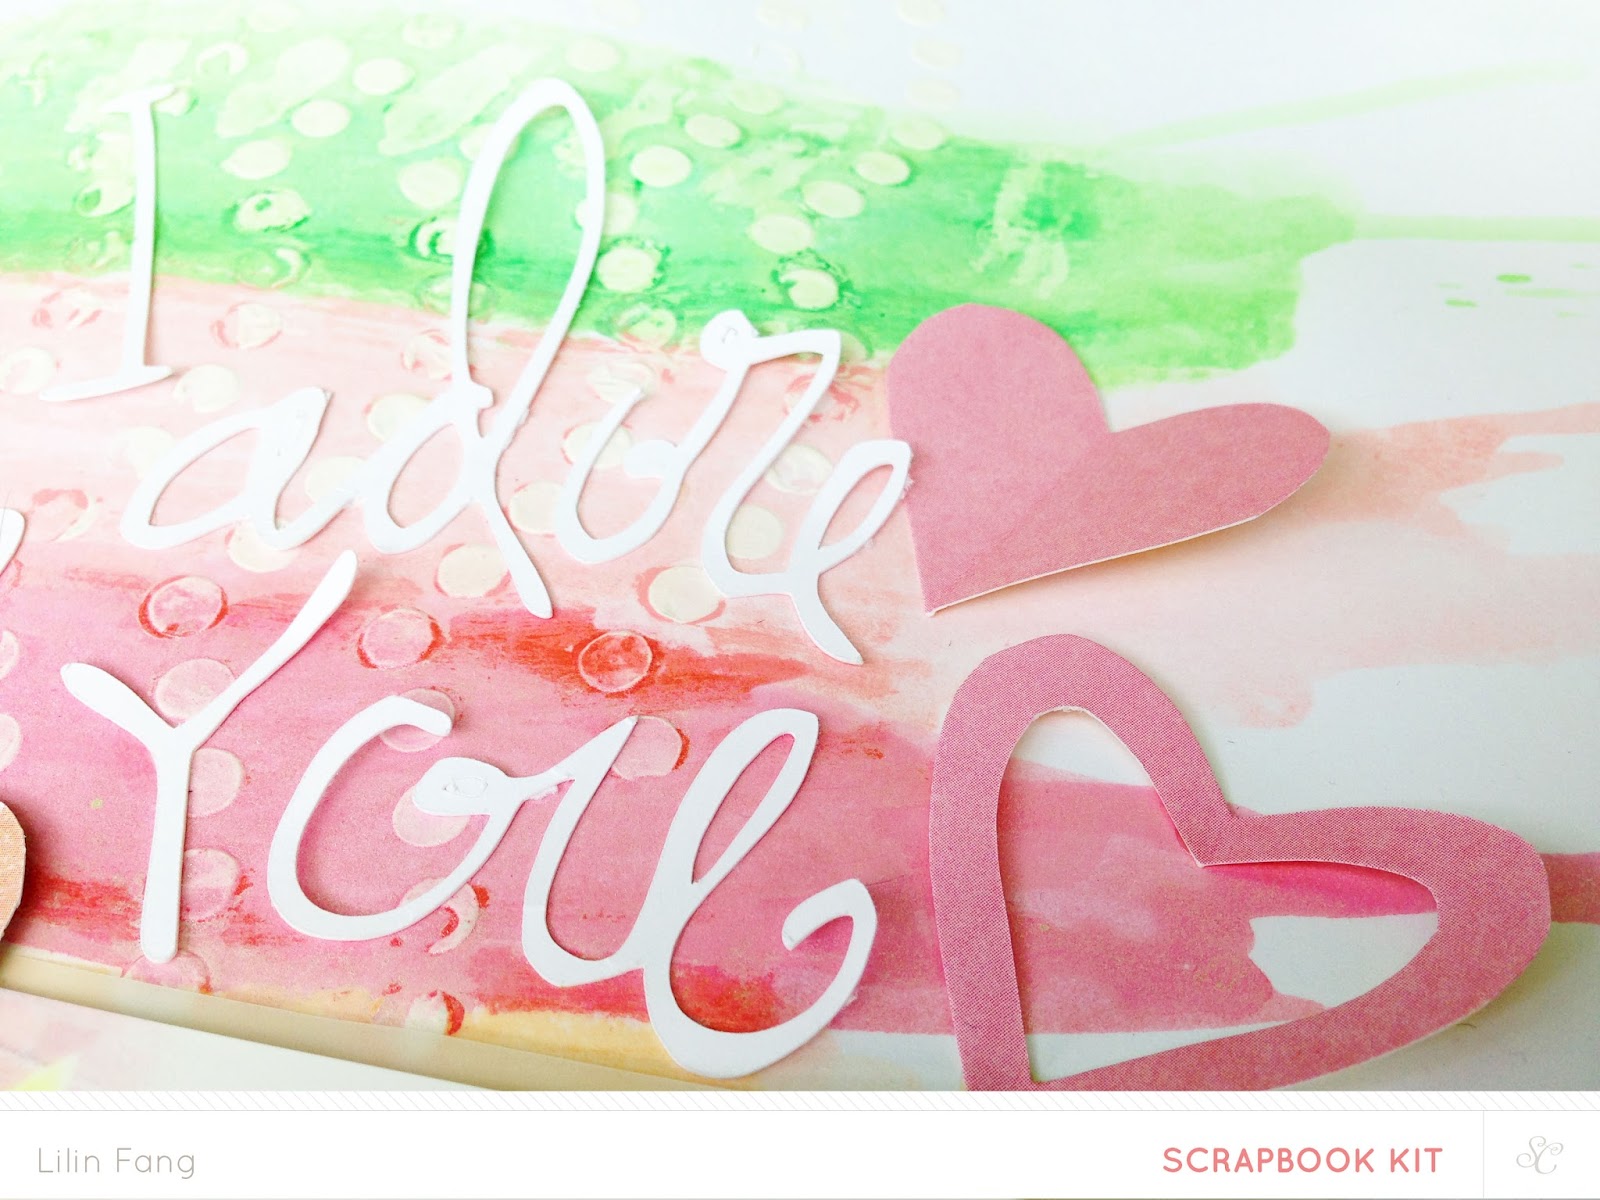
my first sneak is a main kit only layout! with the mixed media class going on, i had to play around with some gesso, gel medium and my new box of gelatos! loving the exclusive digital files designed by suzy and paige evans this month! 


also a main kit only layout. you can get a glimpse of how i used the new mr huey's ink dauber to create some polka dots. i love the new ink dauber! its easy to use and colors perfectly! now, i just need to wait for them to be released in other colors too!


with the beautiful mini album kit that maggie helped to put together, how could i resist making a mini album myself? my new favourite way of journaling is to print them on vellum and attach it to the photo using the tiny attacher... 

more peeks into my little album...


i used a mix of main kit, guinevere and excelibur for this album...

i  hope you enjoyed my sneaks and if you would like to see what other goodies you will be able to find in this month's kits, you can check out the confirmed thread on studio calico message board here

see the full reveal on 27th at noon EST/ 11am CST for subscribers and  27th at midnight EST/ 11pm CST for non subscribers.

Not yet a subscriber? No worries! You can subscribe starting with the April Blue Grass Farm Kits here!

thanks for dropping by and see you at reveal!


Thursday, 10 April 2014

Elle's Studio April Inspiration Gallery

elle's studio exclusive april kit and inspiration gallery is now live! here's a look at the april kit! love the colors of the kit this month! i also love that mother's day tags are included so i can start making mother's day cards early! you will also be pleased to know that coordinating stamp, wood veneers and cut files also available!


these kits are going for $9.99 from now until the end of today (after 12.01 am on the 11th, it will retail for $11.99)! so grab yours from the shop now!

here's a look at what i made...

thankful


i started this page by pasting 3 pages of an old book on white card stock and painted some gesso over the pages. then i used the heart stamp from love you more collection and created a background with inks in various colors. after adding my photo, i had lots of fun embellishing the hearts. to finish off this layout, i then added my title, journaling and some ink splatters with mister huey mist.

ooh la la!


the starting point of this layout is the rainbow card from the kit. i place it in the middle of a white card stock and started fussy cut some hearts using patterned papers that coordinate with  the colors on the rainbow card. i used patterned paper from love you more and 2014 collections as the different color tones and prints give some dimension when the hearts are arranged together. for my photo, i layered it with vellum, doily and some cards from the kit. at this point, i thought the design looks a bit plain, so i added some ink splatters and embellishments. to finish off, i added a label with my journaling.

#1 mom


i love the #1 mom star tag from the april kit and wanted to use it to make a mother's day card. i first covered the white card with a layer of white tissue paper. i then fussy cut stars from patterned paper from the love you more collection and vellum. as i arranged the stars on the tissue paper, i thought the card looked a bit plain so to added some mist to further highlight the colors of the patterned papers. i choose to highlight gold, green and pink here. to make the stars stand out more, i drew outline on each of them. to finish off the card, i added some star wood veneer from everyday moment, a pink ribbon and some sequins. i also created a coordinated envelope by adhering a piece of patterned paper to a regular envelope.

to see more pictures of my layouts and card as well as the list of products used, visit my gallery here... do check out projects by the rest of the talented design team too!

thank you once again for dropping by! happy shopping and see you soon!

Wednesday, 9 April 2014

Elle's Studio April Sneaks

sneaks for elle's studio exclusive april kit has been revealed! this month, there are 2 coordinate add on kits too! these kits are perfect and i used them in 2 of the projects i made for april inspiration gallery! 

here's a peek at what i made this month!


this is my first layout, made with love you more collection. used the heart stamp to create a background for my photo!


this layout is made with the april kit, love you more and 2014 collection. love the mix of colors from the kit.


this is a card I made with april kit and love you more collection.
reveal is on 10th April, 8am pst! do drop by again!

Monday, 7 April 2014

Mixed Media at Studio Calico


mixed media class has started at studio calico and its filled with lots of inspiration and tutorials from celine, ania maria and other talented contributors! most importantly, i am blown away by the layouts and projects from the class participants! now, everyone is a master of mixed media after just 1 week in the class! here are some layouts of the many layouts i love from the class gallery!


playhouse fun by coliekumar


rain day by eyoung lee


longing for spring by carlacrosby


laugh out loud by catB22

these layouts are amazing, aren't they? now i just want to find some time to sit down and try out the techniques introduced in the class! if you are interested in the class, here are some details...


once you have signed up for the class, you will also have access to these beautiful digital files designed by shanna noel...


to sign up or find out more details of this class, you can click here.

you will also be happy to know that the studio calico shop is stocked up with supplies for this class! here are some of the items i bought!


1 | neocolor II - there's a lot of discussion how these compare to gelatos. guess i will only know after i tried them!

2 | gelatos - i've been wanting to get this set for the longest time! i have a set of 4 and i have been using them regularly so i guess it's time for me to get more colors! so glad this is available at studio calico as it's extremely hard to find in singapore.

3 | white gesso - i have been using this for some time. it prepares the surface for paint. love the texture it creates. i usually use it to tone down patterned paper before using them as background for my layouts.

4 | gel medium 

5 | sweet nothings stencil by teresa collins - there are 3 designs to choose from!


some of these shop items like neocolor II and mister huey's watercolors set will be restock soon. be sure to click on the notify button so that you will be informed when they are back in stock.

thanks for dropping by and i hope to see you in the class!

Friday, 4 April 2014

A Closer Look - His Vs Hers


studio calico bluegrass farm kits have started to ship! many of you will be receiving the kits very soon, so i would like to share a quick tutorial of how this layout came together. i made this layout using the main scrapbook kit.


i started the layout by grabbing this semi circle stamp from the kit and created a scallop banner design in various colors on white cardstock. i used color theory ink pads in deja blue, yes peas, sunny day, orange country and well red here. to create a ombre effect, I stamped the ink once and press it down on the paper 2 or 3 times. the inks are really juicy and the colors can be seen quite clearly even on the lightest tone. i have always stamp in black before i got these color theory inks. i did try stamping in color previously but the colors didm't turn out as well and looks botched so i thought maybe stamping isn't for me. so i'm glad i tried these new inks from studio calico. i'm very happy with the stamped images and thought they look quite good for an amateur! it also helps a lot that i’m using the  compact stamp press from fiskars. it has these grids that helps me make sure that my scallop banner is relatively straight!


this is how it looks like after the stamping is done.


to add more interest to the scallop banner, i punched little hearts and stars from the patterned papers in the kit. then i adhered the hearts and stars around base on the colors of the banner. i also arrange my photos on the layout to see how it looks. love these 2 photos of ethan when he was about 7 months old.  a photo of him smiling sweetly and the other of him crying. i took these 2 photo in the span of a few minutes! that’s how babies are, one minute they are happy and the next -crying! ok, getting back to my tutorial! :P at this point, the page still seems a bit plain and i thought it could do with more color and some mess.


 so i decided to add some ink splatters using mister huey mist and i started with the first color on my rainbow banner – blue. i didn’t want the blue color ink splatters to mess up the other colors. hence, i used a piece of rough paper and covered the rest of the layout before i added splatters with navy blue mist.


after the blue inks are dry, i worked on the green portion of the layout. as you can see, i covered the blues and the rest of the colors before applying the green ink splatters in mistletoe.


i repeat the same until i added ink splatters to the rest of the colors. this is how it looks.  i used double yellow for the yellow portion and mary mary for the red portion. i don’t have a mist for orange so i skipped that and thought it looks fine.


once all the inks are dry, i added my photos. since the background is already quite busy, i didn’t layer my photos with any patterned paper. instead i used vellum for that extra layer and it helps my photos stand out from the background. to finish off the page, i form my title with the cute mini badges and woodgrain ghost alpha from the kit. i also added my journaling using the sticker labels included in the kit as well. and the layout is complete!

i hope you enjoyed this tutorial and feel inspired to use your   ink pads!

Friday, 28 March 2014

Bluegrass Farm Reveal

it's time for studio calico reveal of bluegrass farm! presales has started for subscribers and all kits will be on sale for everyone tonight at midnight EST/ 11pm CST. i'm excited to share my projects made with studio calico main scrapbook kit, bessie (add on 1), clover (add on 2) and pip (add on 3). 

my favourite kit this month is pip (add on 3). it's an embellishment kit and its filled with exclusive items like stitchable wood veneers, gold foil badges, puffy heart stickers by twine & ink and more... 


i made 5 layouts these month! to see detail shots and what products i used, you can click on each of the layouts.

up & up
(main kit only)


another beautiful cut file designed by paige evans this month!  
I hand cut the patterned paper petals and used them to cover the top left and bottom right of the page. you could also create a die file with the petals and cut them with the silhouette cameoI left the rest of the petals empty to leave some white space for the photo and title. love the tone on tone effect of the cut file on the white background. i also used the foam tabs to create a slightly dimensional effect.

his vs hers
(main kit only)


when i saw the stamp set in the main kit, i thought of using the semi circle stamp to create a background filled with colorful scallop banner. i choose to work with my colour theory inks in deja blue, yes peas, sunny day, orange country and well red. to create a ombre effect, i stamped the image 2 or 3 times before re-coloring the stamp. to add more interest to the stamped banner, i punched little hearts and stars from the patterned papers and added some ink splatters with mister huey mist in navy, mistletoe, double yellow and mary maryi also love the labels designed by hello forever to help me include my journaling.

yummy
(main kit, bessie, clover, pip)


i love all the patterned papers from the main kit so to display all of them, i made this simple layout by cutting strips of the papers and arranging them around my photo. Love the stitchable wood veneer, wooden tag which I used for my title and the slim washi tape by amy tangerine. i finished the page by adding some ink splatters with mister huey mist in gold, mary mary, navy, skyscraper and mistletoe .

counting stars
(main kit, bessie, clover, pip)


this noteworthy sights paper from bessie (add on 1) is one of my favourite this month. to start this layout, i used mister huey mist in mary mary, double yellow, seafoam and skyscraper to create ink splatters to highlight the circular design of this paper. I placed the photo in the middle and had fun arranging all the embellishments around it.

my faves
(main kit, bessie, clover, pip)


the inspiration for this layout is this dotted heart from the card kit digital stamp set. i used it to create a cut file and cut it with my silhouette cameo to create a mask. using the mask, i painted gesso on the black polka dot paper from clover (add on 2). to add some color, i used gelatos to fill up some of the circles. once my background is ready, i finished the layout by adding my photo, embellishments and added my title with a white crayon to create a chalkboard effect.

i hope you enjoyed my reveal of bluegrass farm! remember subscribers can start shopping now, for the rest of the public, reveal will go live at midnight EST/ 11pm CST tonight and the links to bluegrass farm will not work till then.

thanks for dropping by!!!

Thursday, 27 March 2014

Studio Calico April Shopping Picks!

studio calico bundling for subscribers has started! this month, i really wanted some of the shop items, so i added all the items i want in my cart and was patiently waiting for 12am EST to checkout! i'm glad i manage to get them all! here's a look at what i got this month!


1 | color theory sequins - these are essentials for me! i usually add a few of these lovely sequins to finish off my project! these come in 13 yummy colors! the one i picked this month is mint hint!

2 | color theory buttons - i love purple so i couldn't resist adding these into my cart! there are 8 different colors you can choose from!

3 | color theory ink labels - i love my color theory inks and want to get these to label them.

4 | essential gold chipboard stars - i love stars and love them more when they sparkle! 

to get myself ready for the mixed media class, i also added these into my cart...

5 | gel medium - i've seen wilna used this in her art class and 2 peas videos, but i haven't tried them yet. celine and ania maria will be using them in the new class too, so i bought a tub.

6 | neocolor II - these come in so many colours, i cannot decide which ones to get, so i bought the gold one first since its always the first to go out of stock :P

7 | sweet nothings stencil by teresa collins - these stencils are so pretty, i just got to get them! i think they will be awesome to use with gesso, mist, paint or modelling paste.

8 | mister huey's watercolors set - i been wanting to get these since it was revealed during cha. barbara made a swatch for this, you can see it here.

that's all i got so far... i hope you manage to get what you plan too! happy shopping and see you at reveal!